It is the end of the school year for us.....finally! I can't wait to have my kids home for the summer. I love lounging in PJ's all day, and taking fun day trips to the beach or museums. I'm sure those days will include sibling arguments and a messy house but I choose not to think about that. I have tons of kids activities pinned on Pinterest for those moments I will want to pull my hair out. And when I need a break I will lock myself in my bedroom and skim the internet for new card ideas. That's my plan anyways, we shall see what happens.... Anyways, with the end of the school year comes class parties, school events and teacher gifts. I was room mom for one of my boys classrooms and my co-room mom and I decided on a gift card bouquet for her. It was really fun to put together. I used all of my favorite punches and some techniques I learned from Carrie Cudney herself at the SU convention last year. You can see a quick tutorial on one of the flowers I made here . ...
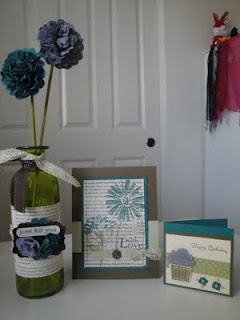
I love the projects featured on the front of the 2011-2012 Idea Book and Catalog, so I just had to re-create them. Here is my rendition of those projects using two of the new 2011-2013 In Colors, Wisteria Wonder and Island Indigo. I will post a tutorial on the flowers soon. SUPPLIES Stamp sets: Create a Cupcake Love & Care (Hostess, Summer Mini) Paper: Soft Suede,Island Indigo,Wisteria Wonder,Very Vanilla; First Edition specialty and celery patterns dsp Ink: Island Indigo, Lucky Limeade, Early Espresso Accessories: large scallop punch, decorative label punch, cupcake punch, word window punch, Itty bitty shapes punch, Blossom Bouquet tripple layer punch, chocolate chip scallop dots ribbon, Victoria crochet trim, vintage brad, basic pearls and stampin' write markers OPEN HOUSE SATURDAY JULY 9th 2 -4:30 pm Please RSVP by July 7th
Well, as promised my SU! website is back on and running. There will always be great up to date information on promotions so check it out! http://www.patriciahicks.stampinup.net/ Happy Stampin' Tricia


.jpg)
Comments
Post a Comment