Posts

Happy May!

Image
The Summer Mini was released today and WOW is is beautiful! So many fun new things. We have three new punches, two of which are called layer punches, you actually get 3 layers from each punch, cute. There are two new Designer Series paper patterns, a lovely nautical pattern and some gorgeous bright florals. I have added a link at the left so be sure to check it out! We usually have to say goodby to many products in the exiting mini catalog, but I am happy to announce a carryover list. The fun seam binding ribbons in Pear Pizzazz, Rose Red, Crumb Cake and Baja Breeze will be staying as well as the punches and die cuts, and I am doing a happy dance over the continuation of the First Edition dsp staying over. Yay! I have attached a link to the full list of carryover items on the left for you to see. Strength and Hope  campaign - As part of our Making a Difference program, Stampin' Up! is proud to partner with The Breast Cancer Research Foundation in the Strength & Hope Campaign

Birthday Card

Image
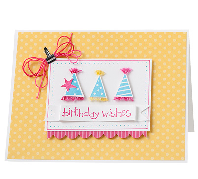
Isn't this card the cutest? I have it featured on my SU! website today. There are so many adorable samples there today! Click here for some fun ideas http://www.patriciahicks.stampinup.net/ Happy Stampin' Tricia

Fancy Pants class

Image
Saturday April 16th - 3:30 - 5pm I am so excited about this class! If you have ever wondered what to do with all of the fun accessories we have this class is for you! We will be making 6 cards using fun accessories, a fancy fold, and a couple new techniques. The cost for supplies is $25 ($20 for club members) and includes a box of vintage brads, lace trim and envelopes. Please RSVP by April 10th. Happy Stampin' Tricia

Wine Tag

Image
Here is what we created at stamp club last week. It is the perfect tag for the perfect gift. One of the ladies in club saw some cute wine tags from a winery and thought "we can make those", so we did. The tag uses the Top Note die (113463) , Square Latice embossing folder (119976), Vintage Springtime dsp (Occasions Mini), and the 3/4" circle punch (119873) for the grapes. To make the grapes we started with a piece of cardstock cut into a triangle. We layered the circles (6 in Perfect Plum and 7 in Concord Grape) from the top down. I did 3 in the top row, 4 the next, then 3, then 2, then 1. The leaf is the 5-petal flower punch in Pear Pizzazz. Happy Stampin' Tricia The April Spring is Blossoming Promotion going on now! Follow the flyer to the left for details. Get your new products today!

Spring is Blossoming promotion

Image
If you received my email, I apologize I forgot to add the flyer. Here are the beautiful creations you can make. The flyer is to the left. This month only, you can get sneak peek items from the 2011-2012 Idea Book and catalog coming out in July. There are two easy ways, first when you order just $20 in product you have the option to buy the gorgeous Paisley petals designer series paper and the lovely Four Frames stamp set, or host a qualifying workshop and receive them both  FREE ! It is a great deal on some truely beautiful products. Speaking of beautiful projects, here is some of the paper from the Paisley Petals dsp, and a look at one of the projects at my upcoming Fancy Pants class. Supplies: Paper - Paisley Petals dsp and whisper white cardstock Accessories - Top Note die, Vintage wallpaper embossing folder, and the 1-1/4" square punch Happy Stampin' Tricia

Sweet Cupcake

Image
It has been a while since I last posted a project. I have been busy with the kiddos and their very busy school and social schedule. I did find time to play with my Create a Cupcake set and the center stair fun fold. We made this card at my last stamp club meeting. We used different colors though. Supplies: stamp set: Create A Cupcake paper: pink pirouette, melon mambo, early espresso and whisper white cardstock; ice cream parlor designer series paper (SAB) ink: melon mambo, early espresso, and pretty in pink accessories: cupcake punch, old olive taffeta ribbon, dimentionals, stampin write markers, and basic rhinestones The measurements and instructions are quite simple. The cardstock measures 4.25" x 11". You cut a slit along each side 3/4" in, from the 1" to 6.5". Along the short side score your cardstock at 1", 2" and at 6.5" from the outside in. Then score at the 5.5" from the left cut line to the right cut line. I have added a small d

Not Stamping Related

I had to share this exciting news! My husband and I are going to be on HSN (home shopping network) tonight! I belong to a website called HouseParty.com, if you don't know about it you should look it up. We won a Kraft Philadelphia Cooking Creme party. We received a free Green Pan, Cooking Creme, spoons, and other trinkets just for holding the party. Then as if that wasn't enough, we applied to Skype our party on HSN, and were picked! So exciting! So we will be on tonight at 7pm p/10pm e. Please tune in! Of course I made the goody bags and will share with you what I did with those later. Happy Stampin' Tricia